06 apr. Fog in the Mountains — A Controlled Approach Using Classic Chrome
After finishing the Rome Through True Classic Chrome series, I started thinking about the tens of thousands of photos I have stored on my computer, spread across different folders, some of them forgotten for years.
At some point I remembered that I had already touched this subject before, in an older post here on the site: Project Fog and Thanking My Fuji X-T20. I used fog images there, but I never tried to unify them or give them a clear direction.
So, I went back into those old folders and selected images from 2021–2022. More than four years old.
And this is probably the first lesson of this article: sometimes it’s worth keeping your RAW files for a long time.
I don’t even know why I kept these ones. I kept others as well, but that’s besides the point.
I looked through around 30 frames, reduced them to 12, uploaded them on my tablet and started editing.
Selection – From 30 Frames to 10 to 6
I ended up with 10 frames.
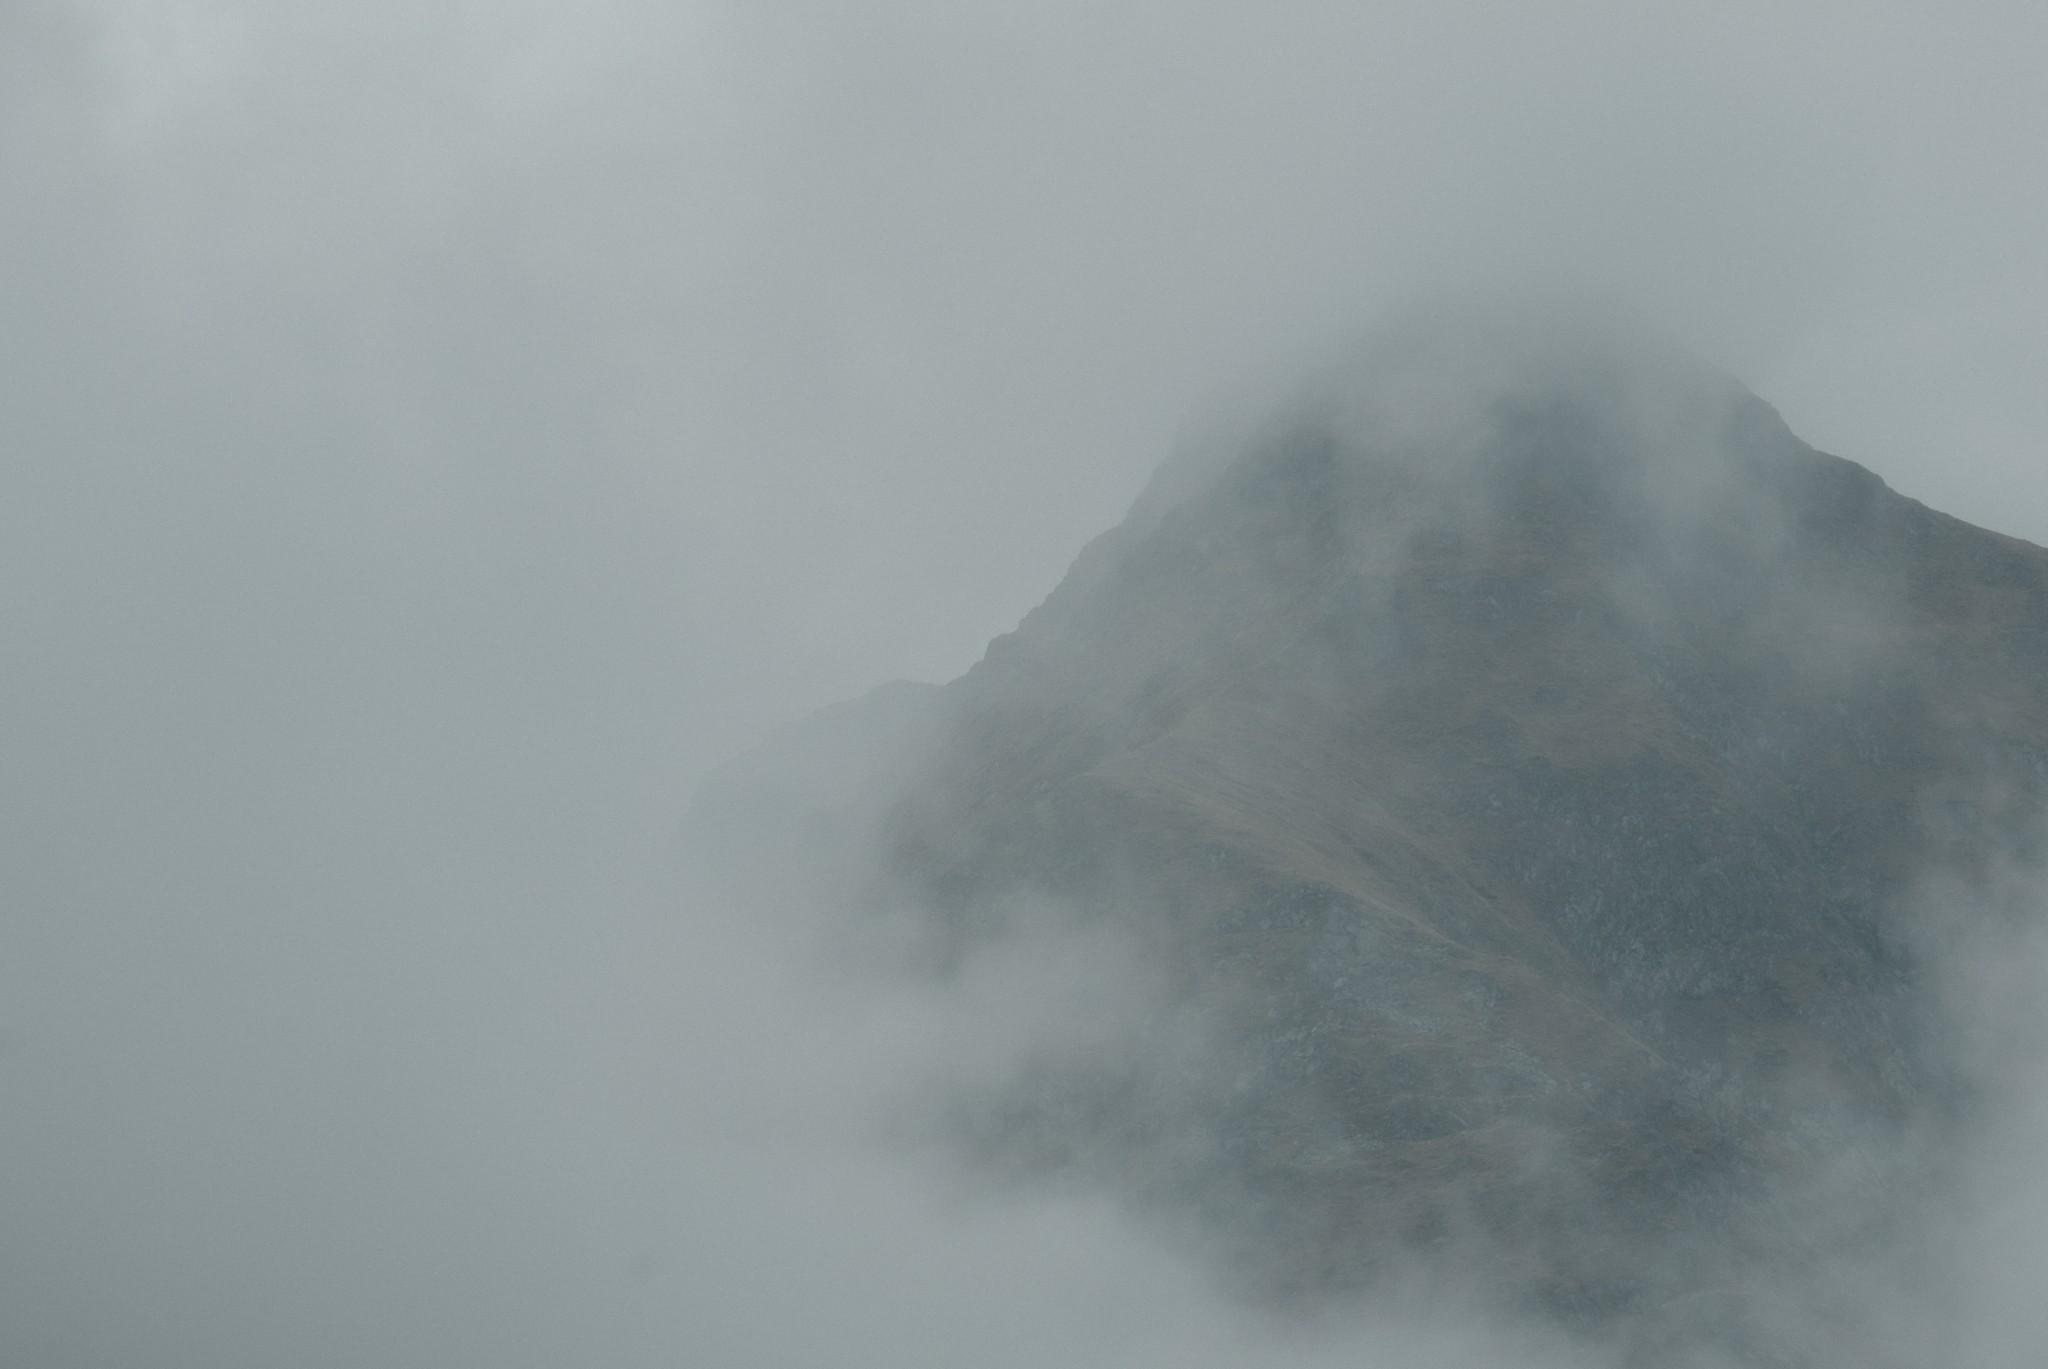
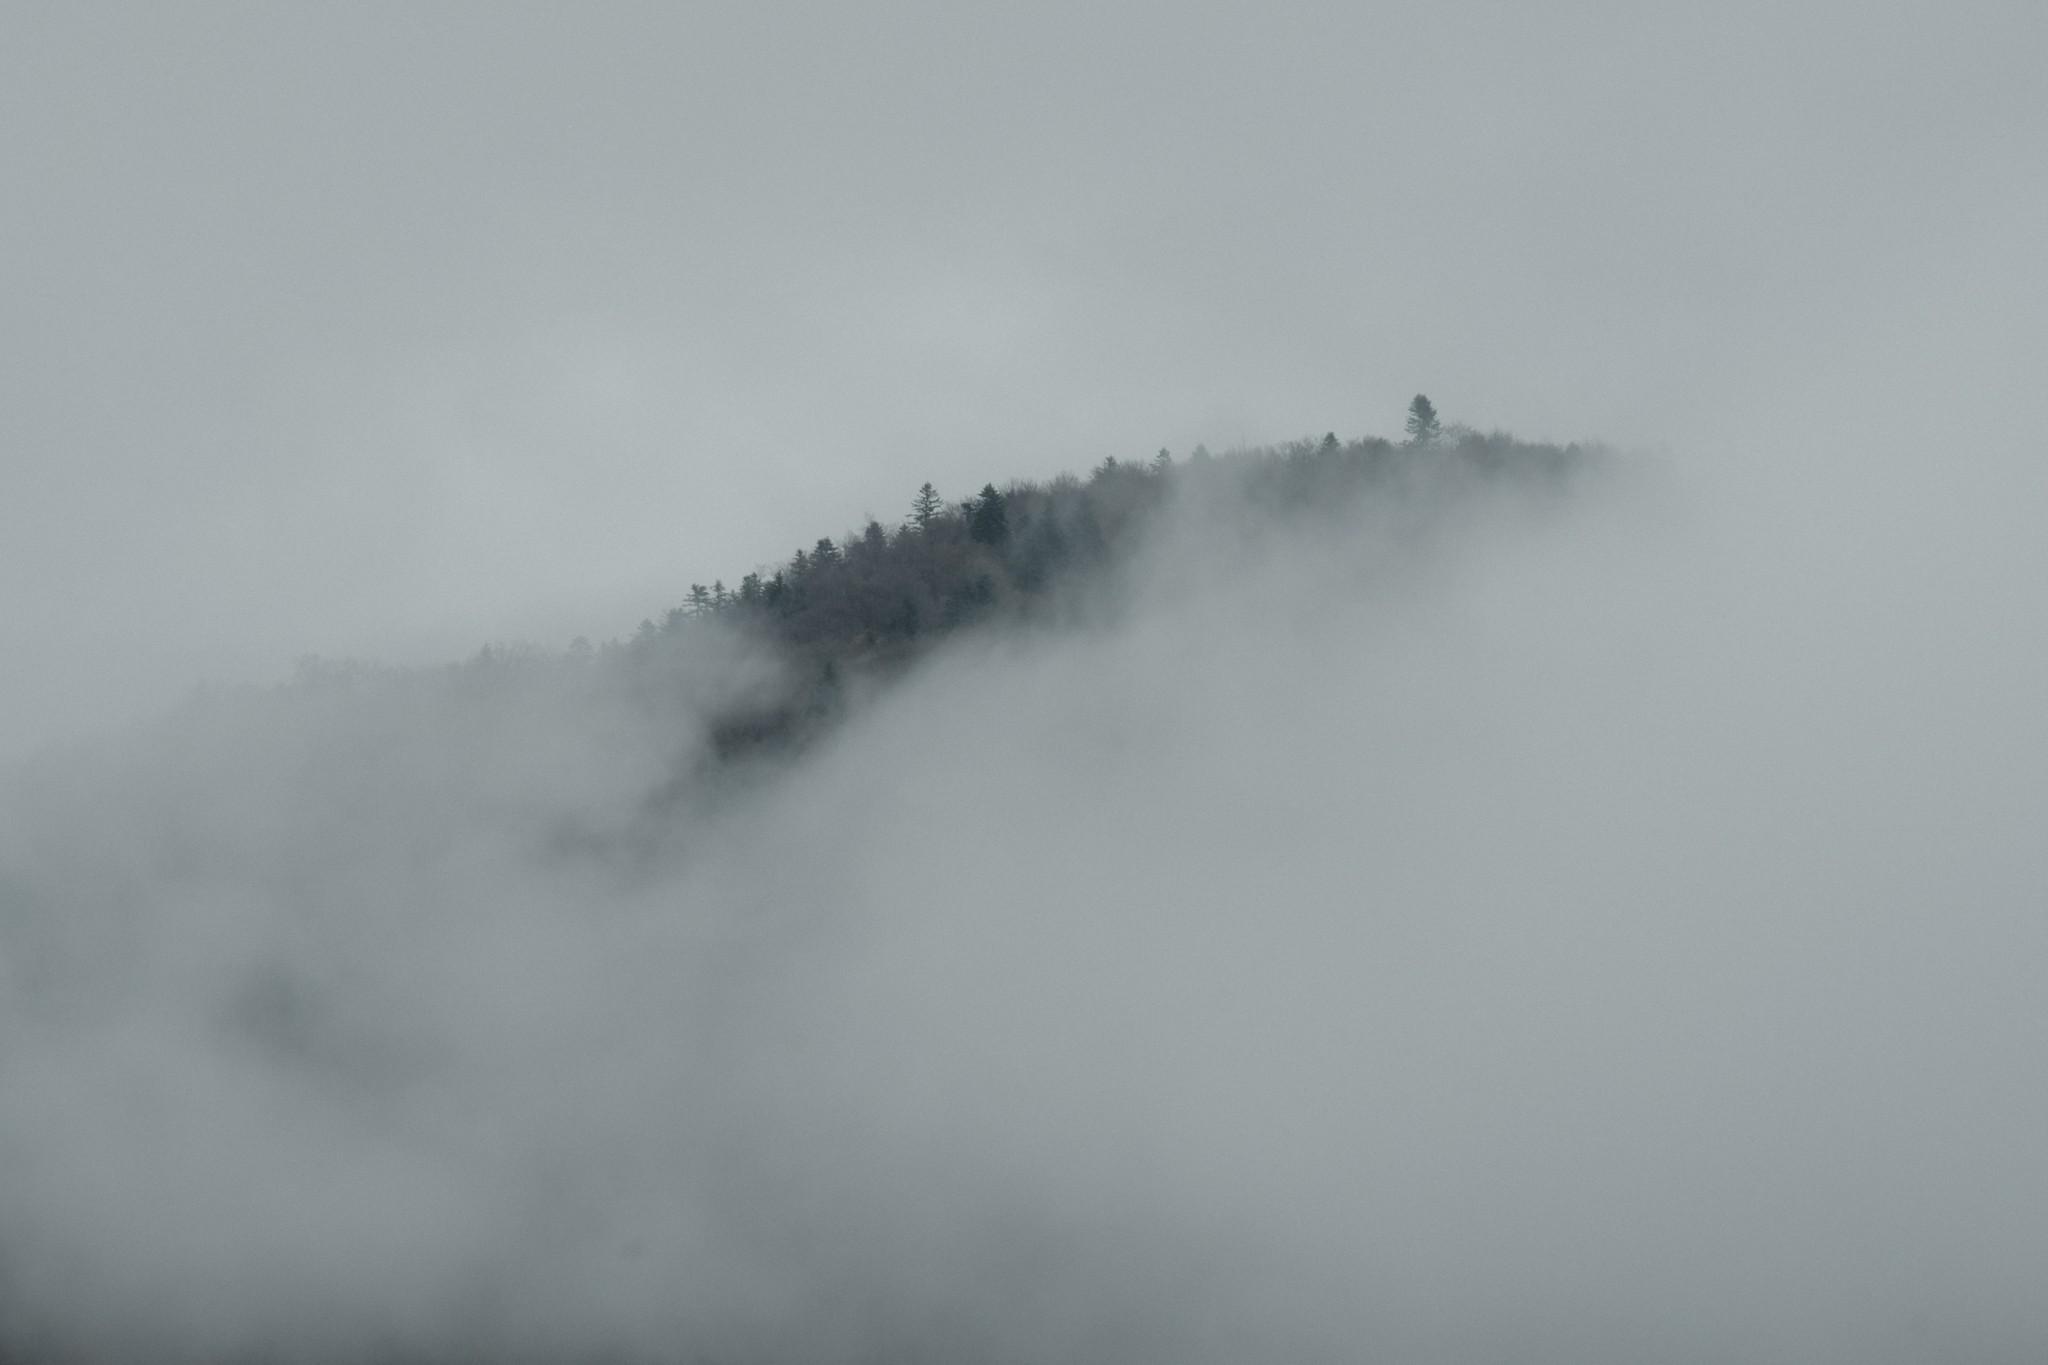
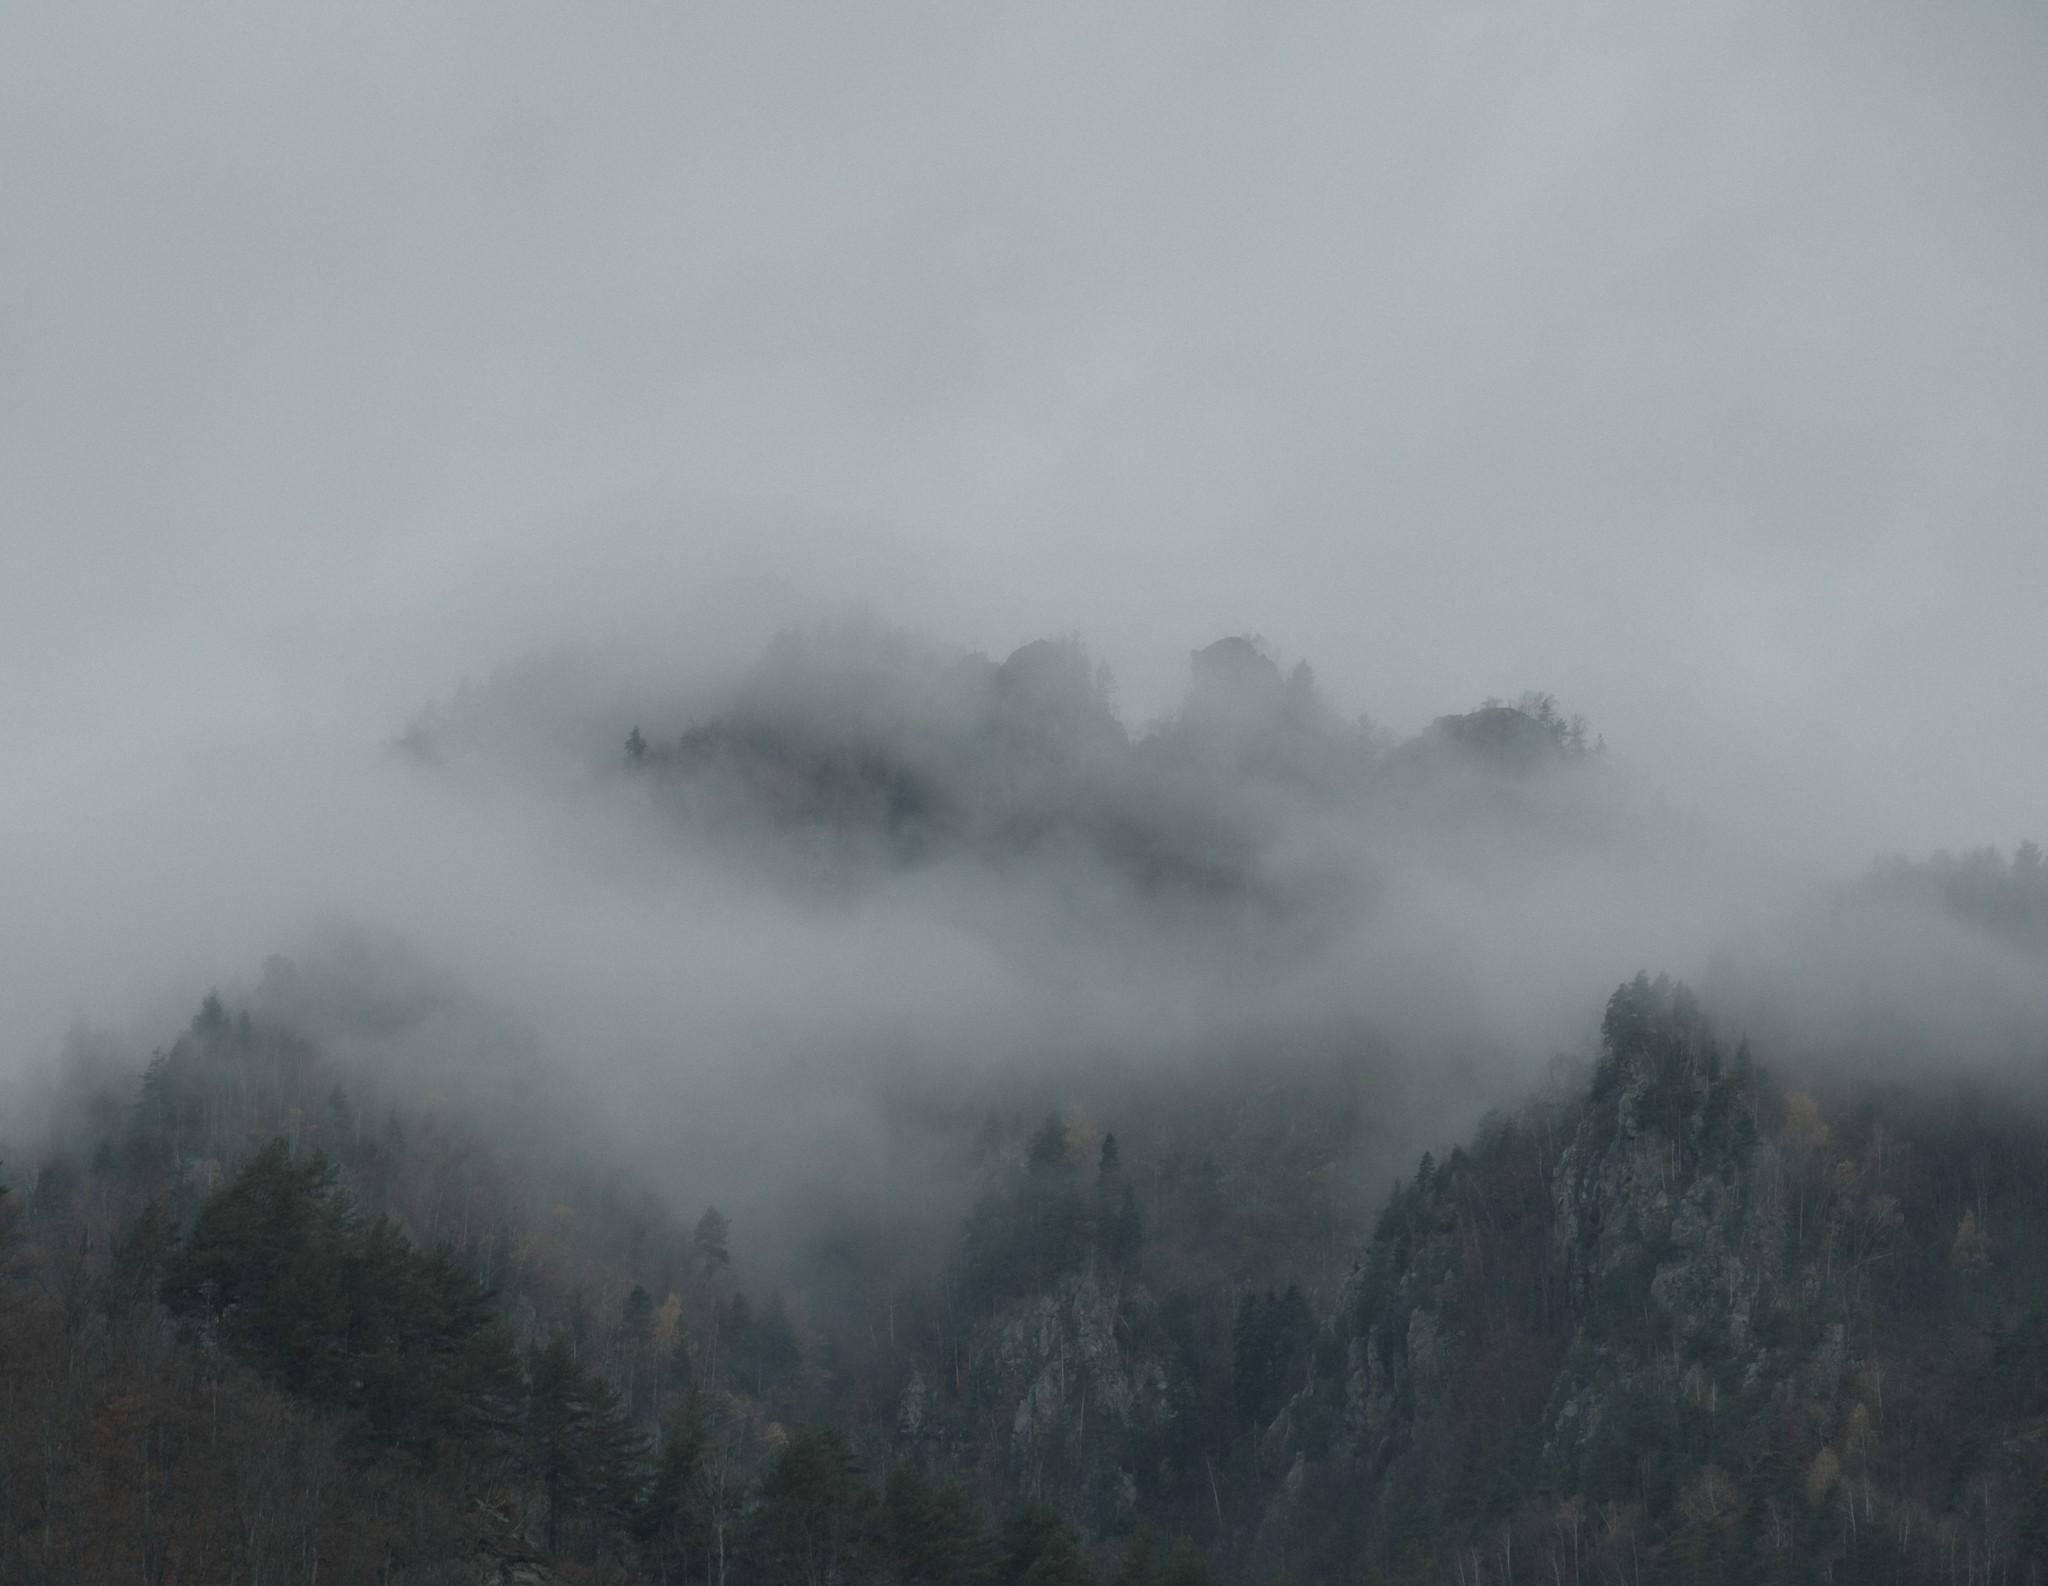
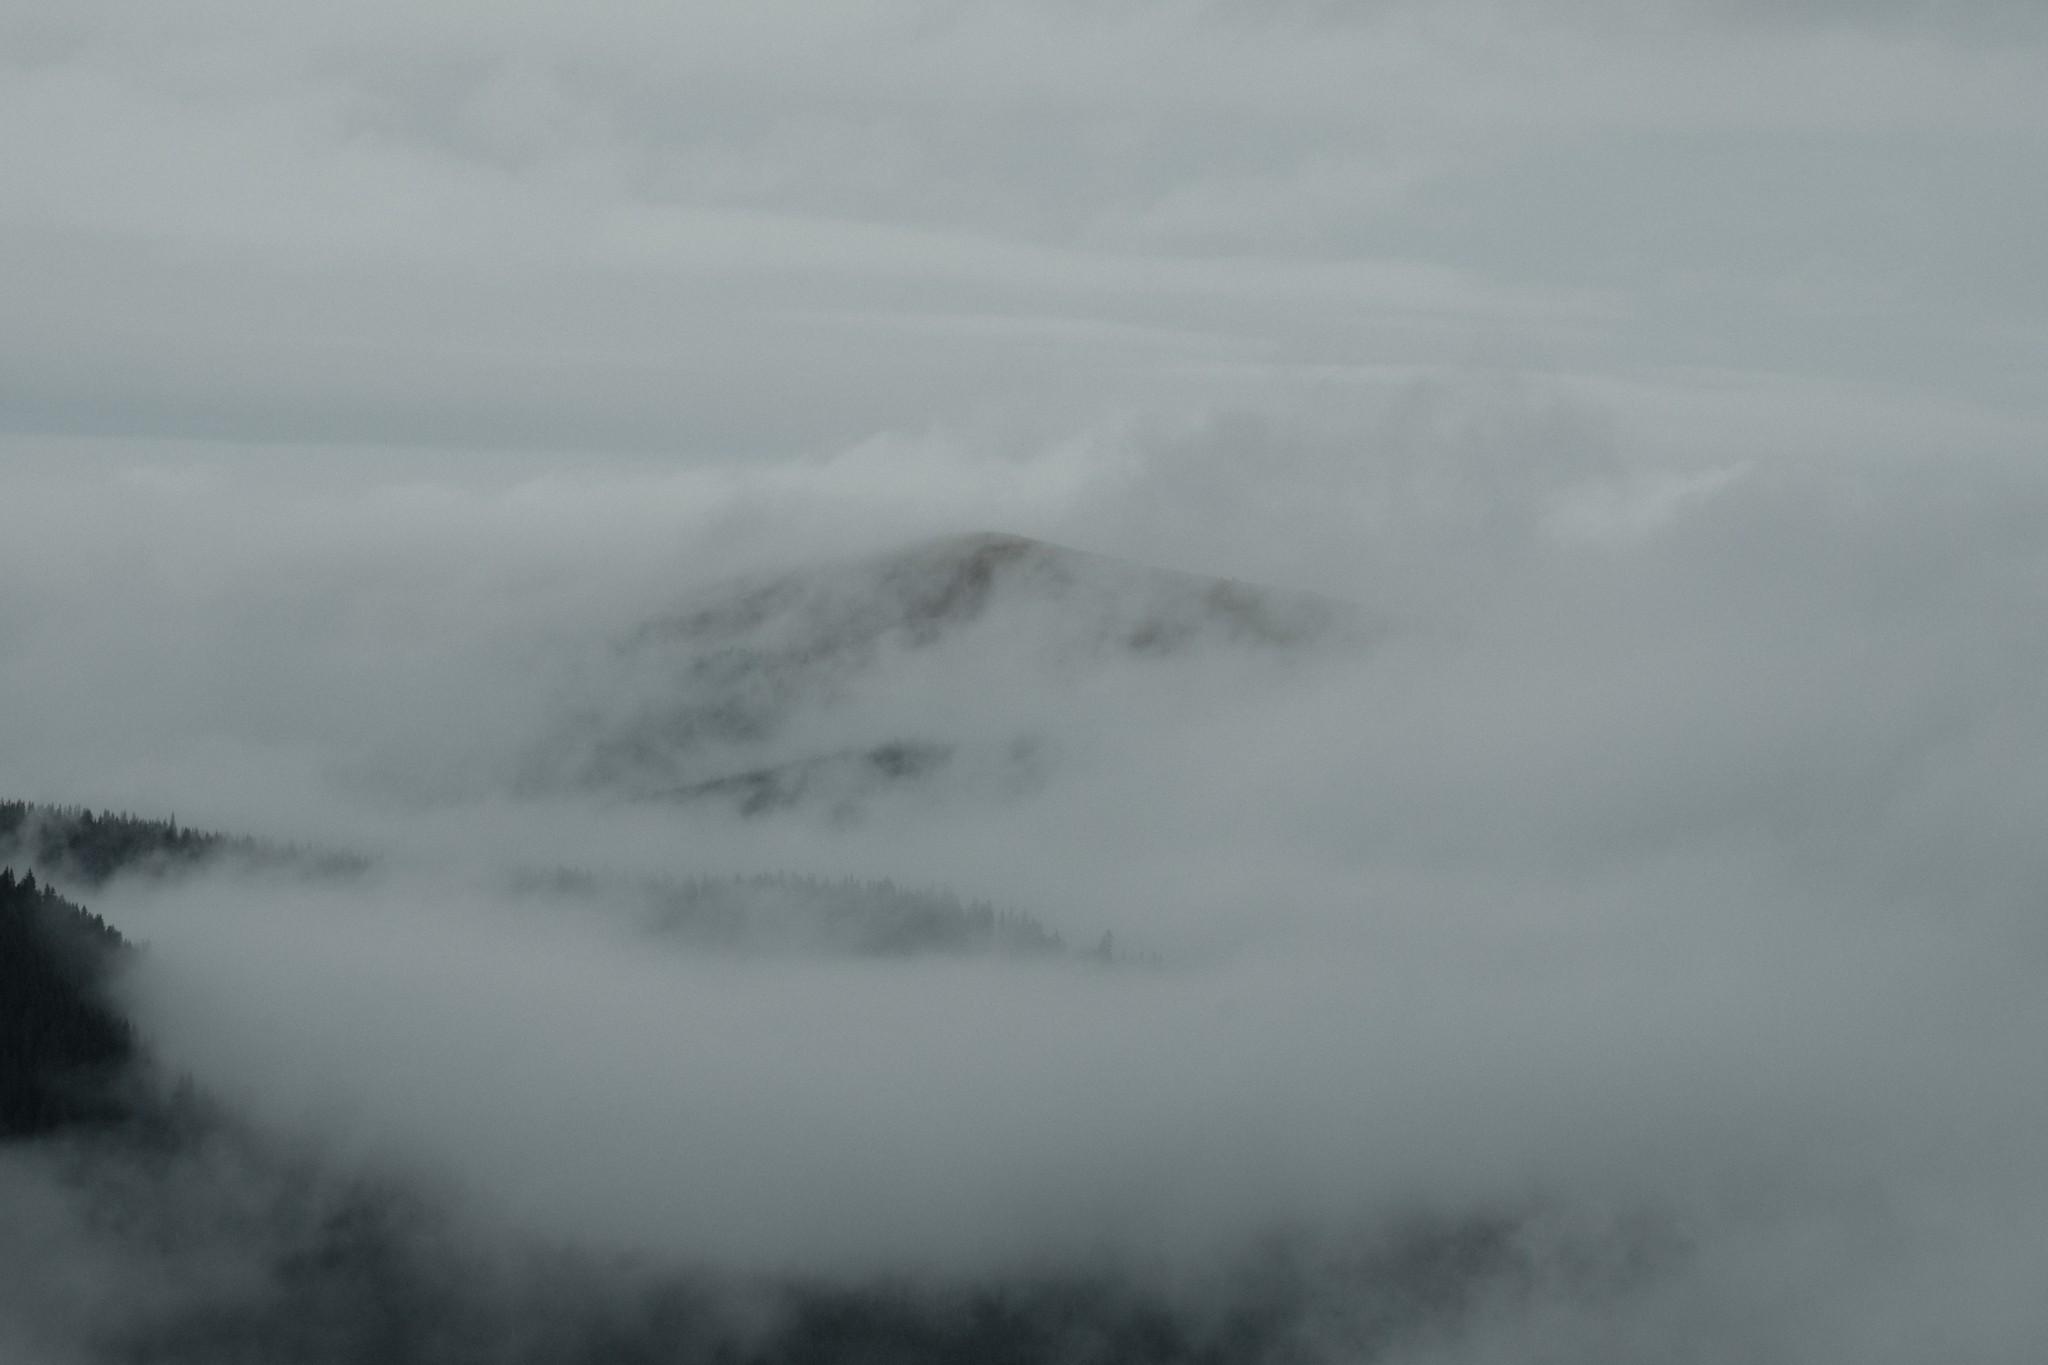
What I was looking for was very simple: fog had to cover, distort and mask reality.
If an image was roughly 50% fog and 50% clearly visible, I rejected it.
Without thinking too much about it, I was naturally drawn to negative space, fog that eats texture, incomplete shapes.
This is how I arrived at the final 10 images that I took into editing.
I had a core of six and four pictures I was unsure about, if they would add something extra to this little series.
Last step, after editing, was seeing if images were doubling what I already had, if they added value to the core six or if they were necessary.
And that’s where I stopped to six.
Small note: I have thousands of pictures on my pc. I could have spent a few hours picking a few more to build a bigger set but I truly think that six is enough to get the point across the table.
Shooting Approach — Nothing Special
From a technical point of view, there is nothing spectacular here. These are not images shot after hours of hiking.
They are not carefully planned compositions.
They are not taken with special gear.
Most of them were shot from the side of the road, from the car, or a few steps away from it.
That’s exactly why I avoided anything too complicated.
Aperture was usually between f/5.6 and f/8 — enough sharpness where needed, without turning the image into something overly technical.
ISO and shutter speed were adjusted depending on conditions. No strict rules.
The only thing I paid real attention to was exposure.
In many cases I slightly underexposed, because fog tends to flatten everything and push the image into a washed-out look. I wanted to keep a minimum separation between layers without losing the soft feel.

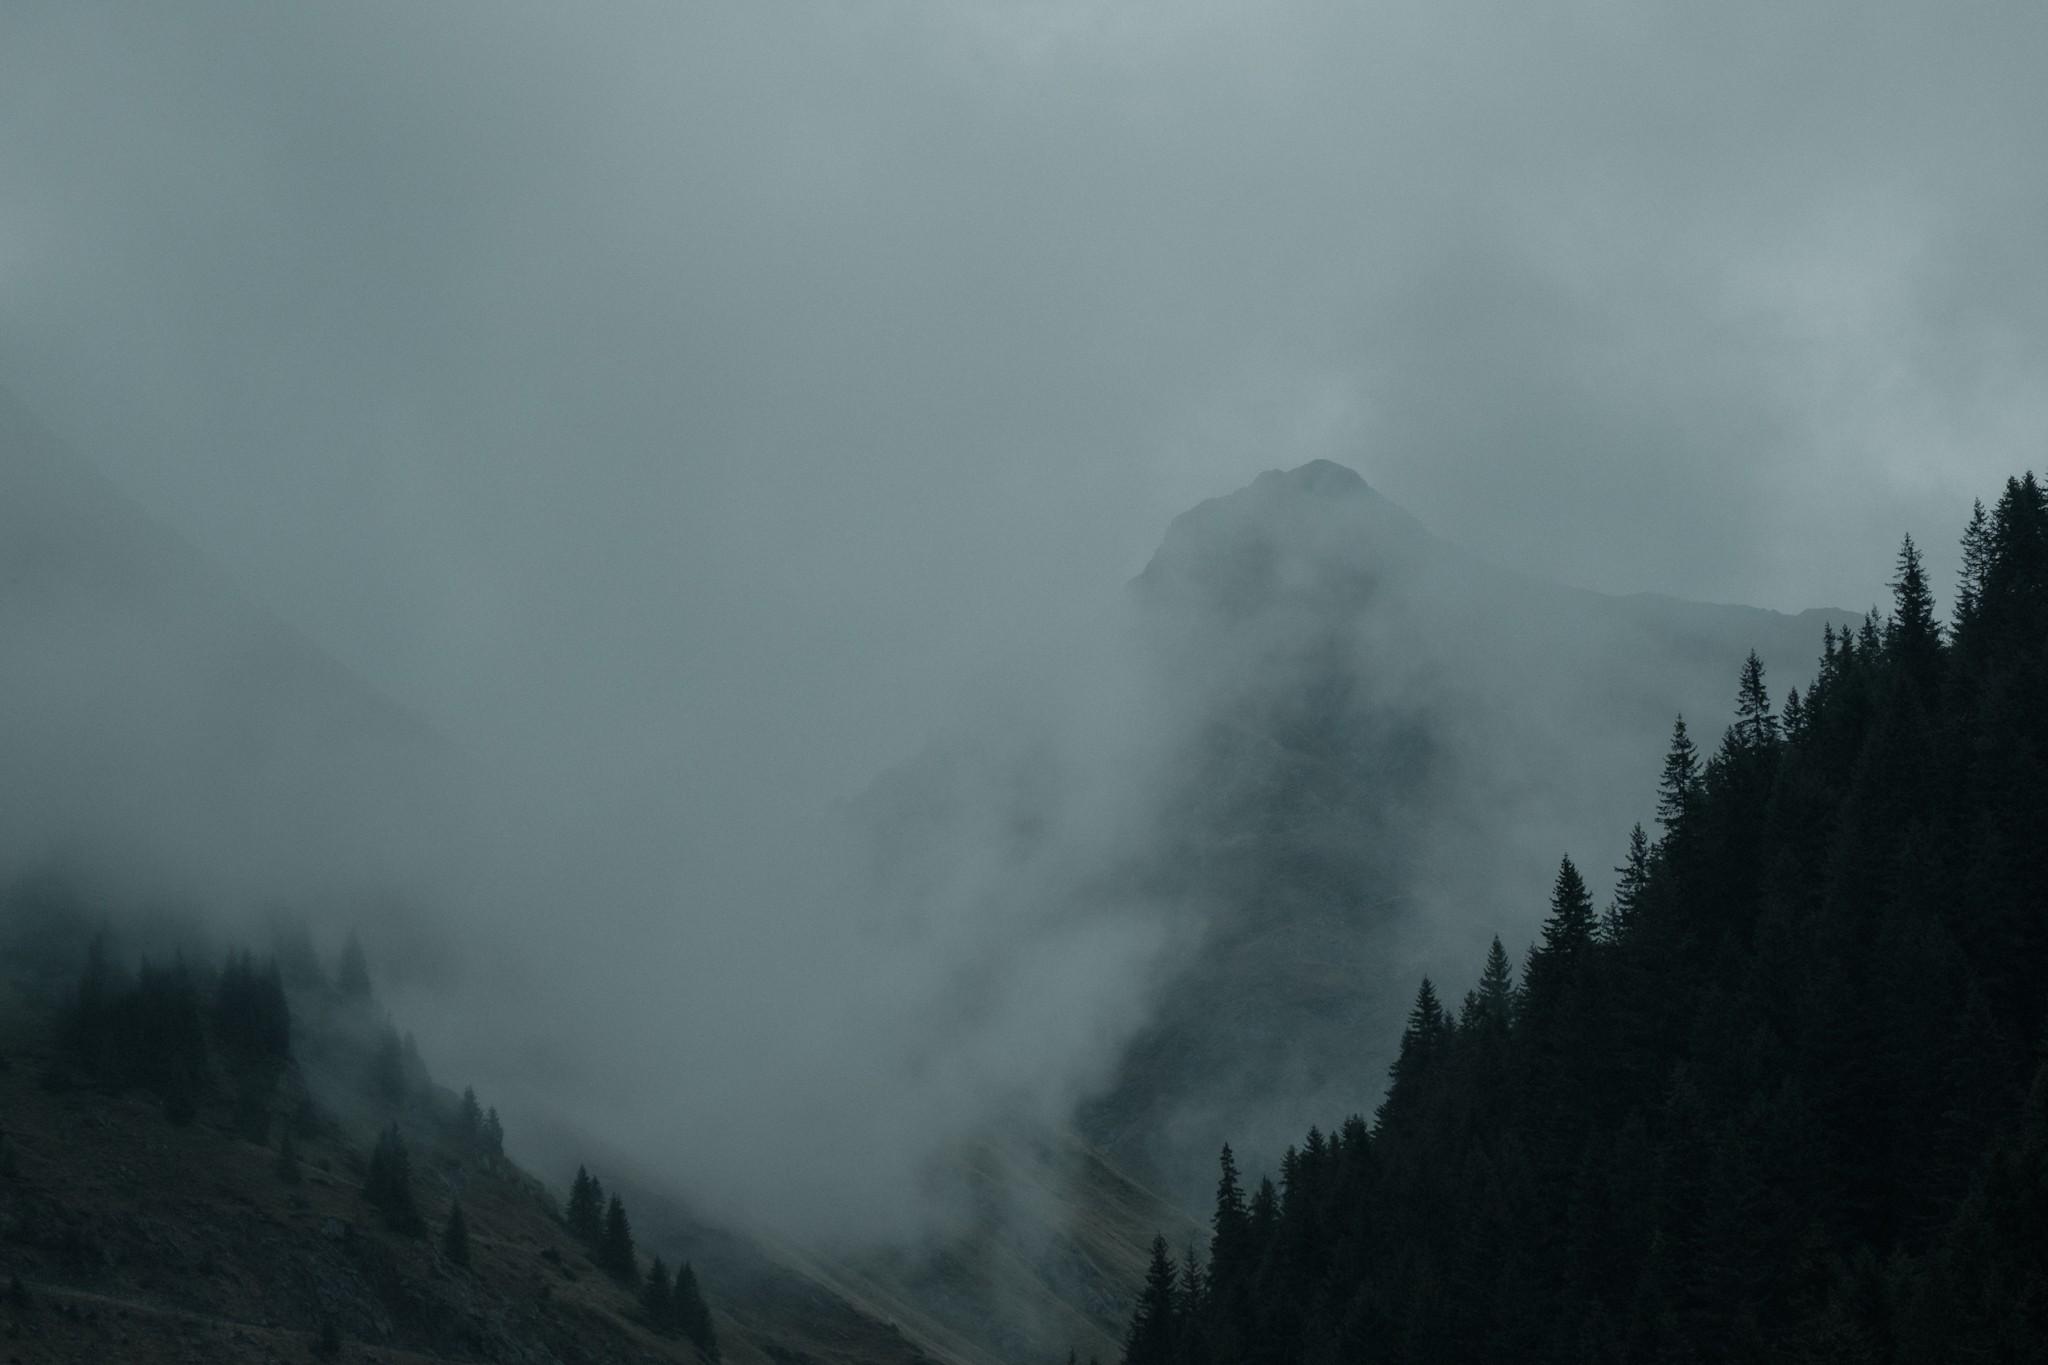
Why Classic Chrome (and Not Black & White)
Once I got into editing, I realized the direction had to be very controlled.
This is where I chose Classic Chrome.
It already reduces contrast and saturation in a natural way. It doesn’t try to improve the scene or make it more dramatic.
In fog conditions, where everything is already soft and desaturated, it felt like the most honest starting point.
I also considered black and white, even a more contrasty style similar to Ansel Adams.
But that approach needs clear separation, strong structure and defined shapes.
These images don’t have that.
If I had gone in that direction, I would have had to invent contrast and structure, pushing the images into something more dramatic than what I saw.
It might have worked individually, but it would have broken the series.
Classic Chrome allowed me to keep exactly what was there: a simplified scene, incomplete shapes, very little information.
And that is the essence of this series.
The Edit — Control, Not Creativity
What I wanted from the edit was simple: don’t break what is already there.
Fog is already doing most of the work.
Any aggressive adjustment would immediately push the image into something artificial.
Base Direction (What I Actually Did)
• lowered contrast
• pulled highlights down to control the fog
• lifted blacks to remove hard shadows
• reduced clarity
• slightly reduced dehaze
Light Adjustments
I kept everything soft, but not completely flat.
• highlights reduced (to control brightness in fog)
• blacks lifted (no deep blacks)
• shadows slightly lifted (but without recovering too much detail)
I wasn’t trying to recover information, only to keep minimal separation between layers.
Presence (Most Important Part)
• clarity reduced significantly
• texture slightly reduced
This is where you can easily destroy images like these.
If you add clarity or texture, you kill the fog.
The image becomes too harsh, too digital.
Dehaze
Used very lightly, sometimes even negative.
I never used it to “cut through” the fog.
Only to maintain that sense of air and disappearance.
Color
Nothing dramatic: greens reduced heavily, yellows reduced, blues kept under control.
The goal was not to remove color, but to make it irrelevant.
Consistency
All images were edited in the same direction. No exceptions.
There is no frame where I said:
• “These needs more contrast”
• “These needs more clarity”
The moment you do that, the series breaks.
A Simple Base (For Clarity)
To keep things simple, this was the base direction:
• Classic Chrome
• low contrast
• lowered highlights
• lifted blacks
• negative clarity
• slight negative dehaze
• desaturated greens and yellows
No Masks, No Tricks
Just like in the Rome series, I didn’t use local adjustments.
No masks. No gradients. No Photoshop. No artificial blur.
Everything is global.
The idea was to show that editing can be simple.
I spent around 10 minutes on the first image to build the preset, then applied it to all others and adjusted each frame for 30 seconds to 1 minute.
That’s it.
RAW vs JPEG
I know a lot of people will say you don’t need to shoot RAW.
I disagree.
Not necessarily because you will edit better than film simulations, but because maybe in 6 years you want to revisit an image.
Software evolves.
Lightroom today is very different compared to what it was 6 years ago.
With RAW, you have flexibility. With JPEG, you don’t.
You Don’t Need Special Locations
I also hear a lot that you need special places.
Yes, that’s true.
When I was in the Dolomites, I understood what it means to just turn around and have 10 great frames instantly.
But these images are not that.
They are shot from the roadside, quickly, handheld, imperfect.
And that’s the point: if the conditions are right, you can build a series almost anywhere.
Final
I know many people will look at these images and think they are normal, nothing special.
That’s fine.
This is not about creating a perfect, print-ready image.
This is about showing how simple photography can be when you have direction.
And once you have that direction, even simple, imperfect frames can become a coherent series.
In the future, I will also approach more complex edits, where a single image is pushed much further.
But this is not that.
This is about control.
Fără comentarii